
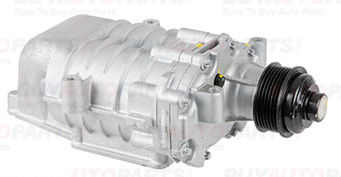
The supercharger serves the purpose of aiding the engine in generating more power. It sends more air into the engine making it acquire more fuel, thereby generating more power. The superchargers and turbochargers perform the same function. The way they get energy to operate differs; the supercharger takes energy from the engine while the turbo takes energy from the exhaust gases. The supercharger install guide below explains the removal and installation instructions:
Supercharger Removal & Installation Guidelines:
Tools Required:
a) Service / repair manual specific to your vehicle.
b) Standard & metric socket and ratchet set with extensions.
c) Standard & Phillips screwdrivers.
d) Torx & Allen head drivers.
e) Needle-nose & standard pliers.
f) Shop rags / towels.
g) Masking tape.
How to get started?
1) Thoroughly review your service manual instructions.
2) Thoroughly clean the fuel rail and supercharger components.
3) Use masking tape to rnark all vacuum lines, electrical connections, fuel lines, and throttle linkages to their connecting points. A little time spent here will save a lot of aggravation during the installation process.
Removal & Installation:
See your manufacturers service / repair manual for the removal and installation procedures that are specific to your vehicle.
Special Instructions:
1) After the removal of the components, be sure to cover any openings leading into your engine. Do not allow dirt or debris to contaminate your engine.
2) Compare your old unit to the re-manufactured unit. Transfer any additional external parts that may be on the old unit to the new, in the exact orientation as on your old unit.
3) Thoroughly clean all mating services.
4) Install the new gaskets and o-rings that were supplied with the supercharger. DON'T USE SEALERS.
5) Properly align and install the re-manufactured unit.
6) If torque specifications were not listed in your service / repair manual, tighten the fastening bolts to 10 ft./lbs. evenly in a criss-cross pattern.
7) When reinstalling fuel injectors, lightly lubricate the injector o-rings with engine oil prior to the installation.
Torque & Service Requirements:
a) Supercharger-to-manifold = 19 ft./lbs.
b) Boost control actuator = 22 ft./lbs.
c) Fuel rail = 11 ft/lbs.
d) Your re-manufactured supercharger has been factory-filled with a specially blended 75W-90 synthetic gear lubricant. Check this lubricant regularly, as described in your owner's manual.
Place an order for your choice of automotive parts at Buy Auto Parts!
Buy Auto Parts carries a wide range of parts for every car make and model. We have genuine OEM replacements and premium aftermarket parts. All our car parts are completely tested and are offered with a warranty. You can look for the parts that fit your vehicle, by choosing the right year, make and model of your car on our online catalog. At Buy Auto Parts, you will find top-quality auto parts at unbeatable prices. You will also receive free shipping for orders more than $99. For any inquiries about our car parts, call our toll-free support line or email us at [email protected].
