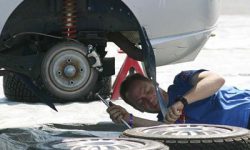
Headlights are one of those deceptively complex auto parts. At first glance, swapping out an old headlight for a new one seems pretty simple. Some cars are designed with easy access to the headlight compartment, but many require the removal of different panels and have hidden nuts & bolts or confusing electrical connections.
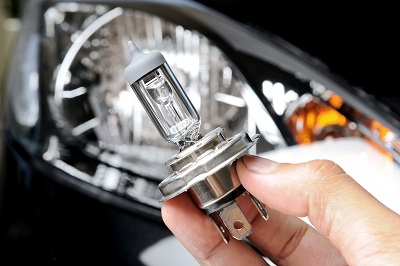
If your headlight has dimmed or gone completely out, it could be due to a variety of reasons. Often, the bulb has burned out. A broken seal or gasket around the headlight compartment can also cause a bad light; if any water, moisture, dirt or foreign substances get inside, the light can go bad. Other common factors contributing to a dead headlight include bad fuses, poor electrical connections and other minor issues.
You’ll save expensive labor costs if you decide to replace your headlight by yourself. Before you take on this project, check out this step-by-step guide we’ve created. The job is fairly simple, but there may be a few things you haven’t accounted for.
1.Before starting the job, make sure you’ve double-checked the part number to match against the original headlight’s OEM number.
2.Open the trunk (for rear headlight) or hood (front headlight) in order to gain access to the headlight compartment.
3.Remove any access panels, if necessary.
4.Locate the electrical connector for the defective headlight.
5.Disconnect the electrical connector, usually located behind the light (sometimes it’s at the bottom of the headlight assembly).
6.Take out the old headlight bub or headlight assembly.
7.Inspect the new part to ensure it has the same appearance, dimensions and similar characteristics to the old part. If you see any differences, check the OEM part number again.
8.Connect the new headlight bulb or install the new headlight assembly.
9.Ensure all connections (electrical components, screws, nuts & bolts) are secure. Any small movement will result in rattling or vibration during driving.
10.Reinstall any panels removed during step #3.
11.Once new bulb or headlight assembly is installed, test the new part and make sure everything functions OK. If necessary, operate parking lights, high beams and other functions.
If light isn’t functioning properly, revisit step #9, and also ensure there is no water, dust or dirt in headlight compartment. If so, you may need to replace the headlight compartment gasket or other sealing device.
We hope this handy guide will aid your headlight replacement project. BuyAutoParts.com stocks popular headlight assemblies for many years, makes & models. With our easy ordering system, you can quickly select and order your headlight part. Best of all, we have affordably priced headlight components backed by an industry-leading warranty. If you need help selecting a headlight assembly, call our car part specialists at (888) 907-7225. Thanks for visiting the BuyAutoParts.com blog. We love to get feedback from customers, so feel free to drop a line on the BAP contact page.
Written by Dara Greaney