 How to properly install all the air conditioning components in our Air Conditioning Compressor Kits.
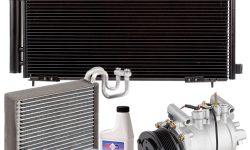
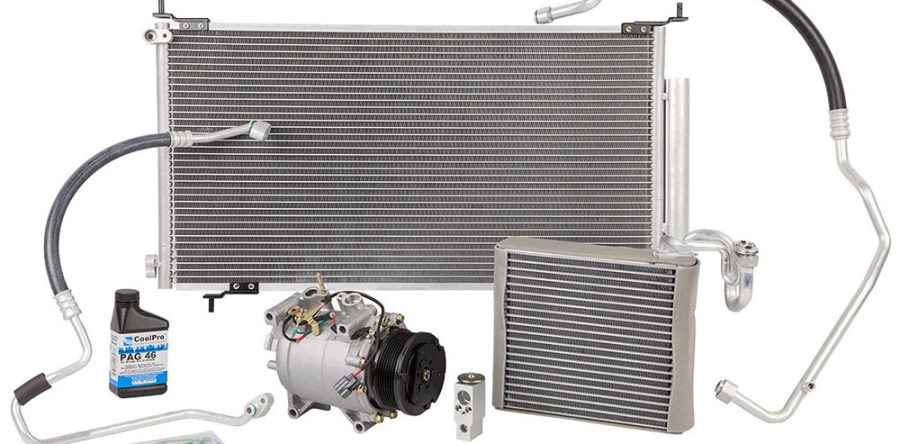
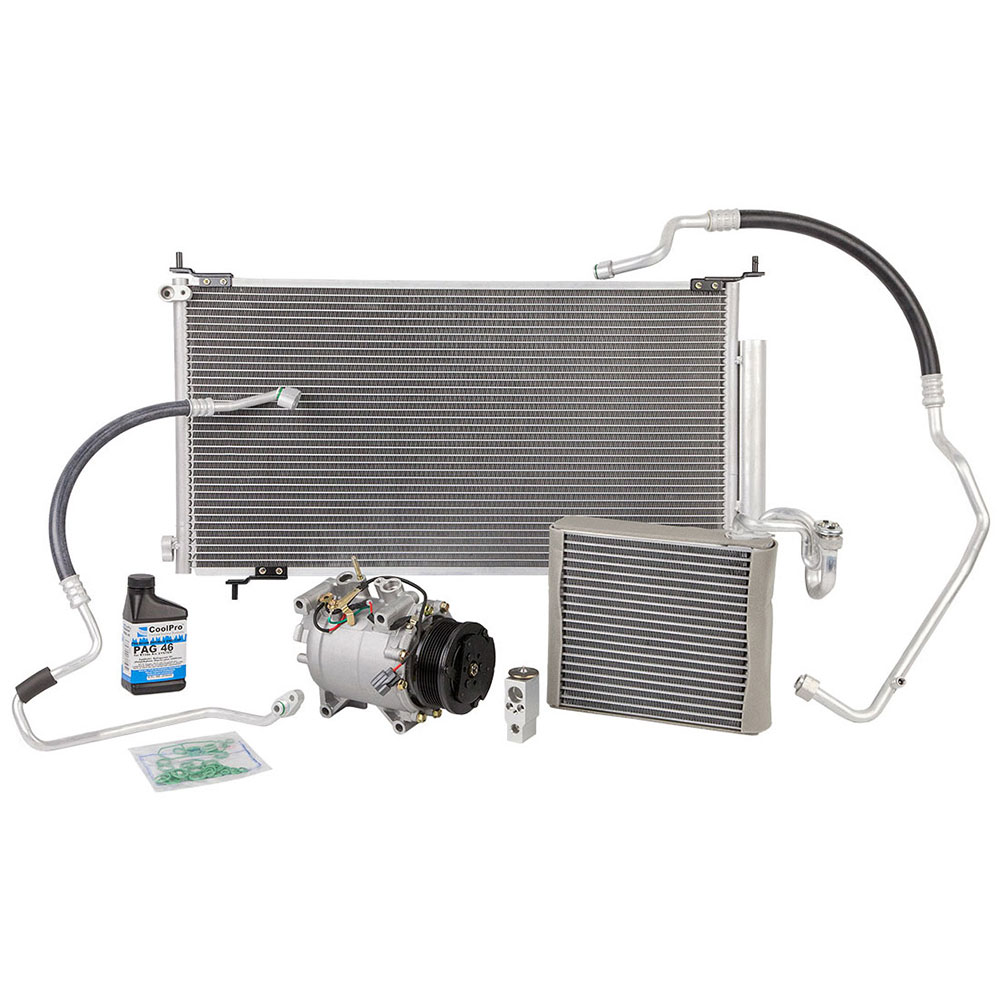
At BuyAutoParts.com we have one of the largest AC Compressor Install Kit inventories in the country. Each kit comes with the correct parts to get the job done right the first time. Here are the directions on how to install each part of the kit.
1 - Recover Refrigerant from System:
- Before opening the AC system, the refrigerant must be recovered from the system using approved equipment. This is required by law!
- Disconnect the negative battery cable.
- WARNING: It is highly recommended that you wear eye protection while working on vehicle air conditioning in order to prevent injury and/or vision impairment.
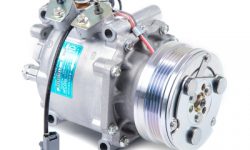
2. AC Compressor:
- Locate the AC compressor in the vehicle. Make sure the new compressor matches the one in the vehicle (there may be slight differences if you purchased an aftermarket compressor).
- Once you have located the compressor, remove the compressor belt. There is a possibility you will need to remove other belts to access it.
- Disconnect the electrical connector. There will be a wire leading to it. Carefully unplug the connector.
- Disconnect the refrigerant lines from the compressor using a wrench. If you are going to reuse the lines make sure to cap them to prevent contaminants from entering the system.
- Now you can remove the compressor by removing the bolts that hold the compressor in place. Make note of each bolt and their placements.
- Drain the oil out of the new compressor. Then pour the correct amount, and type, of new oil into the suction port or filler plug of the new compressor.
- Place the new compressor in the same position as the compressor that was removed. Reattach the bolts, connect the lines, plug in the electrical connector, and put on the belt. Always use new seals/O-rings to avoid leaks.
- PLEASE NOTE: If your old compressor has a plug on the back and the new one does not, you will need to remove the plug and attach it to the new compressor for reuse.
3. AC Expansion Device:
- Locate and remove the old expansion device by carefully loosening and removing the fasteners. It may require twisting and wiggling to release. Be careful not to damage any surrounding components.
- Apply a small amount of mineral oil or dielectric grease (silicone grease) to the O-rings to ensure a proper seal.
- Align new expansion device with housing, making sure O-rings are properly placed.
- Secure the new expansion device by tightening the bolts or screws. Be careful not to over-tighten, as it could damage the expansion device or housing.
4. AC Condenser (Not Included in All Kits):
- Clear anything that is blocking the condenser, such as headlights, radiators, condenser fan, etc…
- Take off AC lines that run to your condenser, and remove O-rings.
- Remove AC condenser, making sure it does not get hung up on any hoses or wiring.
- Install new condenser by matching up all of the mounting locations.
- Install the AC lines and replace the O-rings. The O-rings need to be coated with mineral oil or dielectric grease to ensure the correct seal.
- Reinstall any parts you removed to access the condenser.
5. AC Lines (Not Included in All Kits):
- Locate the AC line in the vehicle and make sure it matches the new line. You may need to remove other parts to access and remove the AC line.
- There are different styles of lines with different methods of removal, the most common being the threaded block with O-rings. Loosen and remove the nut. Pull out the AC line.
- Lubricate the O-rings before you install, using mineral oil or dielectric grease.
- Install the new AC line, making sure the O-rings do not get pinched. Tighten the nut, but do not over-tighten. Repeat the process on the other end of the line.
6. Evacuate the System:
- After installing/reinstalling all parts, evacuate the system with a vacuum pump for 30-45 minutes. This process will remove air and moisture from the system before introducing the refrigerant.
7. Test the AC System:
- Run the vehicles air conditioning for at least 10 minutes for the system to stabilize.
Troubleshooting:
- Not cool enough... This may be due to improper vacuuming before recharging, or a leak. Check for leaks and make sure the system is correctly vacuumed and recharged.
- Clutch not engaging... This could be due to electrical problems or a defective clutch. Check wiring and fuses. If that looks fine, then the clutch might need to be replaced.
- It is noisy... This could be a sign that the compressor was not installed properly, or loose bolts. Make sure all bolts are tightened correctly and recheck install.
- It is leaking... Damaged seals or faulty connections to the lines could cause leaks. Check all of the seals and connections. Replace or tighten as needed.
- No Power... There could be a problem with wiring, fuses, or a relay if your compressor is not getting enough power.
Full AC Kit Install Videos
Part 1
Part 2
Part 3